Friday, July 31, 2009

Apricots!

Ahh, fresh local apricots. We got 2 1/2 lbs. of apricots in our regular fruit share this week, along with 1 1/2 lbs. of golden sugar plums and 1 pint of sweet cherries. I also ordered ('cause I am crazy) 5 lbs. of apricots at wholesale prices. I just can't seem to turn down these opportunities for abundant amounts of local fresh fruit.
The first mission was to make Apricot Riesling Jam because I have been thinking about it ever since the recipe was posted on Simply Recipes.
I made it on Wednesday with about 4 1/2C of apricots, 2C sugar, 1/3C local Riesling, and 5T lemon juice. It simmered and I skimmed off the bright yellow-orange foam. I ended up with 3 half pint jars. (I know there are only two jars in the picture but I already gave one away.) Yum!

I just finished making apricot chutney. In fact, 3 jars are still in the hot water bath! I used a recipe from Parsley, Peppers, Potatoes, & Peas: A Cook;s Companions for Handling, Using, and Storing a Garden's Bounty by Pat Katz. I got the book at the public library a few weeks ago and it has been a great reference for cooking and storing the veggies and fruits we've gotten in our farm share. What follows isn't exactly the recipe from the book, as I didn't follow it precisely.

5 lbs. apricots
1C white vinegar
1/2C apple cider vinegar
1 1/2C white sugar
1C raisins
1 1/2C Vidalia onion, chopped
3 small cloves garlic, minced
1 1/2 inch piece ginger, minced
1t cinnamon
1/2t black pepper
1/2t cloves
1/4t allspice
1/4t cayenne


I put all the ingredients in a large stockpot and brought it to a simmer. I stirred it a few times and let it cook for 20-25 minutes until the apricots were soft and the chutney was thickening. I then ladled it into sterilized jars and put them in a boiling water bath for 10 minutes. (There goes the timer!) The recipe made 7 half pints. I can't wait to try it, but the recipe suggests waiting at least a month before eating chutneys.

Monday, July 27, 2009

Blueberry and Apricot Buttermilk Cake

On Sunday night after chicken sandwiches, squash and tabouli we ate cake. Earlier in the monthI posted about a cake I made with black raspberries that was supposed to be made with blueberries.
Last week I bought blueberries to add to the currant jam and I had nearly a quart of local blueberries left. But in our farm share this week we got apricots and I couldn't decide between a blueberry cake and an apricot cobbler or pie. The compromise was a blueberry AND apricot cake. I used the recipe for blueberry boy bait from smitten kitchen. I used about 1C blueberries total, as the recipe calls for, with 1/2C in the batter and 1/2C as a topping. I also used 3 apricots. I blanched them to take off the skins and the two ripest ones nearly turned to mush. I added those two to the batter and I used the one that kept its structure in the topping. The result was that the cake batter was lightly flavored with the apricots I added in and the chunks were still discernible in the topping. And as before, I used buttermilk rather than regular milk. Overall, it was a hit. As you can see we only have 3 pieces left!

Tabouli

Last night we had a mostly chilled summer dinner of grilled chicken sandwiches, grilled squash and tabouli. First, for the tabouli. I almost followed the recipe on the bag of bulgur wheat but minus the fresh mint. If I had planted the mint that I bought weeks ago, we may have had enough to add the fresh mint. Instead, I left the mint to fend for itself in its little plastic tub. I went looking for it and realized it must have gotten so dry that it was light enough to get blown right off the back deck. Ooops. Now it is happily in the ground but I had to use dried mint in the tabouli!

1/2C dry bulgur wheat
1/4C chopped parsley
1/4C chopped fresh mint (I used about 1T dried)
1 small cucumber, chopped (I used a platinum cuke from the farmers market)
1 tomato, chopped
1/4C green onions, chopped
1/3C lemon juice
2-3T olive oil
salt and pepper to taste

Following the directions on the bag, I rinsed the bulgur in a strainer, set the strainer in a bowl, and covered the bulgur with boiling water. I let this sit while I chopped all the ingredients. With everything but the bulgur in a bowl, I stirred it up. I drained the bulgur, rinsed it with cold water, pressed the water out through the strainer, and fluffed the bulgur. I stirred in the bulgur and chilled the tabouli for a couple hours.

The chicken for the sandwiches was cooked on the grill and sliced up. On slices of a baguette we had chicken, lettuce, tomato, fresh mozzarella, and pesto. We used a batch of garlic scape and walnut pesto. On the side we also had grilled squash including a zucchini, a yellow squash, and several very sweet and tasty patty pan squash. All the squash came in our farm share this week.

Tuesday, July 21, 2009

Lentils everyone will love!

This is a cold lentil salad that everyone will love. A couple of summers ago my husband's cousin lived with us for a few months. When I would make this salad, which is usually enough as a side dish for about 8 people, he and my husband would polish it off in one night. And neither of them like lentils. Hmmm. The saddest part of that story is that this salad is great the next day so peering in that empty bowl was always a disappointment.
I got this recipe from my aunt who makes this every year at the beach. It is a favorite there too. I am not quite sure how she scales this up to feed nearly 20 people, but it is always a hit!

1 1/2C green lentils
6C chicken stock
1 garlic clove, whole and pierced with a toothpick
1t herbes de Provence
1 small bay leaf


1 tomato (the recipe calls for the tomato to be peeled, seeded, and chopped, but I just chop it)
3 green onions, finely chopped including some of the green tops
1T fresh parsley, chopped (I use about 2T)
1T capers, drained (I use about 2T)
Rinse and pick at the lentils. Put lentils in pan with stock, garlic, herbes de Provence, and bay leaf. Bring to a boil and reduce heat to simmer uncovered. Cook the lentils until tender, about 20 minutes, and be careful not to overcook them as they will turn to MUSH! Drain the lentils and leave them to cool. Remove the bay leaf and garlic clove.

Once cool, put the lentils in a bowl with the tomato, onions, parsley and capers. Whisk the vinaigrette (see below), add to the lentils, and toss. Sprinkle crumbled goat cheese (recipe calls for 2 1/2 ounces of chevre and I use about 4 ounces) on top and serve, or chill and serve.

Vinaigrette
1/2C olive oil (I use about 1/4C)
2T lemon juice
1t Dijon mustard
1/2t salt
fresh ground black pepper

Monday, July 20, 2009

Macaroni salad

Just one more quick post for today. I have been experimenting with cold pasta salads this summer. (I posted one with ingredients similar to an antipasto platter.) Since then I have been using the toss-in-everything-but-the-kitchen-sink method and for the most part they have been tasty, but I have been in search of a simple and classic macaroni salad.
Last night we got a spontaneous invitation from some friends to come over for burgers. It was about 5pm and I asked what we should bring. A green salad, maybe? Both my husband and his friend wanted a macaroni salad. And by 5:30 I had the salad ready to go and we were at their place before 6pm. I used a recipe that was posted just the other day at Simply Recipes. Conveniently, we already had a roasted pepper in the fridge, parsley in the garden, and spring onions from our farm share. And so because we had all the ingredients it was as simple as cooking the pasta and hard boiling a few eggs. I worried that the salad wouldn't be cold enough but running cold water over the pasta after it was cooked did the trick. This is a delicious and simple macaroni salad!

Currants, currants, and more currants!

Last week black currants were available at wholesale prices through our farm share. Figuring I should start out slowly, I ordered the 5lb minimum. I realized when I picked up my 5lbs that the regular share for the week was cherries and more currants. Home again, home again with 6lbs of black currants! (The picture shows the 1lb we got in our regular share for the week.)

I started out on Wednesday by washing and freezing about 1lb. On Thursday, I dried about 1lb in our food dehydrator. This was the first time I had used it and I was shocked that it took 24hrs to dry the currants! Nonetheless, now I have a few cups of dried currants to be used in scones, yummy.

I tackled the rest of the currants this weekend by making 3(!) batches of jelly and preserves.
The first batch I made was plain black currant jelly using the recipe in Alice Waters' Chez Panisse Fruit. I cooked 4C of black currants and then let the juice drain out leaving the skins and seeds behind. I was left with 2C of juice, which I cooked with 1 1/2C of sugar. From this I got 4 4-oz jars of currant jelly.
For the second batch, I started improvising! I wanted to use the black raspberries that I have been saving from our backyard, but my husband has dreams of a black raspberry pie. I had heard from the woman in charge of the fruit farm share that her favorite combination with black currants is blueberries. At the store I found local blueberries available for $3/quart. In the next batch I used about 3C black currants and 1qt. blueberries. This resulted in about 3C juice to which I added 2C sugar. This boiled away for a few minutes and was enough for 6 4-oz jars of black currant and blueberry jelly!
Remember those many many many pounds of strawberries that I picked a month or so ago? I took a 1qt. bag out of the freezer to thaw. I used the remaining currants, about 3C, and the strawberries to make what I think might be called preserves since I used jelly and jam making techniques. I cooked the currants first and let the mash sit with juice dripping through the strainer. Meanwhile, I cooked down the strawberries with 2C sugar and the juice of 1/2 a lemon. After the strawberries had cooked down, I added the currant juice. I let this boil for a few minutes and then filled 2 8-oz and 2 4-oz jars of currant strawberry preserves. Yum!!

Tuesday, July 14, 2009

Pimento Cheese!

I have been trying to do a little bit of cooking in the morning before I leave the house for school. I usually make a side dish to go along with dinner or something we can each for lunch the following day. This morning my project was pimento cheese. Last week red and yellow bell peppers were as good a price as I have seen them for awhile: $1.99/lb. I bought one of each color and roasted them when we had the grill going for sausages. After they were nicely blackened, I put them in a brown paper bag to steam. Once they had cooled enough to handle I peeled them and took out the seeds. I put them in a jar in the fridge.
This morning I took out the roasted red pepper and sliced it up in to about 10 strips. I sliced an 8-oz. block of sharp cheddar cheese into chunks that could easily fit into the chute of my food processor. I started with the shredder attachment and alternated between adding cheese and peppers. Once I had shredded everything I moved everything to the side of the bowl in the food processor so I could put the regular chopping attachment in the bowl. I pulsed a few times so that the cheese and roasted peppers were mixed but I didn't want to turn it to mush. (This process is really best done using a meat grinder, but I don't have one.) I decided to store the cheese and roasted pepper mix without adding mayo but I'll add the mayo in batches as I use it for crackers or a sandwich.

Monday, July 13, 2009

Guacamole

I hear that the best avocadoes are “black and blasted” according to Daniel Pinkwater, though I don’t personally know the reference. But that is about the perfect description of the look of a tasty avocado and the feel should give but if your thumb sinks too far or if the skin feels empty under your pressure, stay away! Also, I think avocadoes are best if they can sit on the counter or in the fruit bowl for a day or two to ripen.

Halve 2 avocadoes and scoop out the flesh with a spoon.

Cover with the juice from ½ a lime and mash with the back of a fork.

Add to taste the following:

1/2t salt

1/2t dried oregano

1/4t garlic powder or 1 fresh clove of garlic

1/4t onion powder or 1T diced red onion

1T cilantro, chopped

Lime juice (from ½ to 1 whole lime total)

(Many recipes call for tomatoes too but I prefer for the tomatoes to stay in the salsa!)

Fish Tacos

We grilled the fish outside over charcoal; however, it can also be baked at 350 for about 12 minutes or until it starts to flake easily with a fork.

1lb haddock coated lightly with oil and lime juice

Tasty toppings include….grated queso fresco or Monterey jack cheese, lettuce, cilantro, chopped fresh jalapenos, scallions, salsa, guacamole, and a hot sauce.

We lucked out with the perfect hot sauce for the tacos! Our neighbor is Thai and a great cook. She made us a hot sauce that was the perfect spice and tang to go with fish, but heck if I know what’s in it!

And we fry our own shells, which makes any taco the most scrumptious meal ever! We buy corn tortillas, usually La Banderita brand in the refrigerated section. In a small fry pan, heat at med-high about ¼ inch of vegetable oil. You want the oil hot enough that when you slide in a tortilla it sizzles. Fry one side to light golden brown (usually 2 min) and flip. Using tongs fold the tortilla in half to form a shell. Fry about 1 min and flip to fry the other half of the outside of the shell you just folded for 1 min. Remove it from the pan and let the oil drip off in the pan. Then place it on paper towel to cool and harden. If you place it upside down more oil will drain off and it’ll keep its shape better than if you let it collapse closed on its side. These shells will keep pretty well. You can wrap unused ones in foil, keep them for a day, and they don’t need to be refrigerated. You can also go ahead and fill them, wrap them, and refrigerate them for lunch the next day!

Friday, July 10, 2009

Tortes and Pies, yum yum!

This week in our farm share we got something that wasn't green: yellow squash! It is still early in the season here for yellow squash so we were asked to only take 2. I used one in a delicious torte based on a recipe from smitten kitchen: herbed summer squash and potato torte. Without any careful measurements, I halved the recipe to make one torte. I used 1 yellow squash and 3 red potatoes (the recipe calls for yukon golds), each about the size of a baseball. 
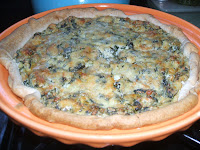
This worked about to be about two layers of each potatoes and squash and the top layer was a mix of the two. After each layer of squash and potatoes I drizzled olive oil and added the cheese mixture from the recipe (parmesan, flour, fresh thyme, black pepper, salt, and fresh green onions also from the farm share). I baked this covered at only 350 (because my pie was in the oven too) for about 20 minutes and then upped the temperature to the called for 375 for another 20 minutes and then let it cook uncovered for about 15 additional minutes. I also added a touch more cheese before that final 15 minutes: it was looking a little bare on top. What a tasty treat, especially with the farm fresh squash and scallions! (And as a side note, the piece I just ate reheated for breakfast was good too!)

And on to the pie. I hope you weren't getting too excited about another desert. We still have blackberry cake left from the other night.
This pie was a savory pie. I used a spinach and ricotta recipe, but I substituted swiss chard for the spinach.
I use a store brand refrigerated pie shell, though obviously this would be all the tastier if you made a homemade shell.
Cook 10 oz. frozen spinach, cool, and drain.
Mix with 1 lb. ricotta cheese (I use skim, low fat ricotta.)
Add 1 large egg
1/4C parmesan, grated (powdery works better than strands)
1/3C flour
1/2t nutmeg
Fill the pie shell with the mixture and top with an additional 1/4C parmesan and dot with about 2T butter.
Bake at 350 for about 40 minutes until the top is starting to brown. (If you use swiss chard and put a torte in the oven halfway through, it'll take an extra 10 minutes at 375 to brown!)
Instead of spinach, I used the fresh swiss chard from our farm share. The taste of the chard in the pie was richer and more interesting that the spinach usually is; however, the chard must retain so much more moisture than the spinach because it altered the texture of the pie. I steamed the swiss chard nearly to death, or so it seemed, and yet, it was still moist enough to make the pie less dense than usual. The taste was worth it, though, and as the pie cooled it solidified nicely. So maybe swiss chard and ricotta pie is really designed to be eaten for lunch for the next two days, which is exactly what my husband has done. 1/4 of a swiss chard and ricotta pie + 1 piece of blackberry cake = lunch!

Thursday, July 9, 2009

Pork, Salad, and Cake!


For dinner the other night I made a pork tenderloin. I was inspired by a recipe for pork with an orange marmalade glaze. I more or less followed the recipe with approximately 1/3C soy sauce, 1/3C honey, 1/3C orange marmalade, hot pepper flakes, and black pepper. I let this simmer for about 10 minutes on the stove, let it cool to room temperature, and then let the pork sit in about 1/2 the mixture for about 30 minutes in the fridge. The recipe calls for at least an hour marinade, but I didn't have time. I cooked the tenderloin, covered with foil, at 350 for about 30-35 minutes. After about 20 minutes, I flipped it over once and spooned on the rest of the sauce. I took it out of the oven when it reached nearly 160 degrees, figuring it would keep cooking for a few minutes.On the side I had a green salad made with a fresh head of green lettuce from our farm share. I added green pepper, red onions, and some sliced carrots. I made a quick salsa buttermilk salad dressing. I got the idea from a local restaurant that serves a salsa buttermilk dressing on their taco salad that I absolutely love. I haven't quite matched what they create, but I have gotten close with a combination of salsa, buttermilk, and sour cream. Sometimes I also add some lime juice and chopped cilantro. For the salsa, I usually use the jar of salsa we always have in our fridge: Herdez medium (sometimes hot) salsa.And last, but definitely not least(!), I made cake.
We have a black raspberry bush in our backyard that reached its peak this week. Last year we had enough from that bush and one at my husband's shop to make a pie for 4th of July. Obviously, the weather was better last year if they were ripe a week earlier. Unfortunately, the bush at the shop was cut down so I relied on our bush and one down the street next to the bus stop.
I didn't have enough berries for a pie so I made a cake. I used the recipe for a blueberry cake from smitten kitchen. Instead of blueberries, I used black raspberries. The recipe calls for 1C of blueberries and you mix 1/2 in the batter and sprinkle 1/2 on top before cooking. I used about 1 1/2C black raspberries with 1/2 in the batter and 1/2 on top. This worked out well because the black raspberries don't expand like blueberries do so having more berries was necessary. The recipe calls for whole milk or buttermilk.
I used buttermilk (we had it around from the coleslaw and salsa buttermilk dressing) and I am so glad I did because it added a lovely tang. This is a delicious cake: moist, perfectly sweet, and rich. I am sure this cake would work well with a number of different berry combinations!

Wednesday, July 8, 2009

July 4th!

My husband and I had a lovely getaway over the 4th of July weekend. We met a couple of our friends for a relaxing weekend of sun, boating, fishing, and of course, EATING!
Dinner Saturday night came off the charcoal grill. Our main dish was a selection of grilled sausages (lamb and mint, mushroom and asiago, and hot! Thai) and sliced onions.
On the side we had a roasted potato salad. My husband diced and roasted the potatoes in the oven. The roasted potatoes were mixed with about 2T mayo, diced orange pepper, diced fresh jalapenos, red onions, and probably a few other things. I didn't carefully watch the whole process, oops!
We also had corn on the cob roasted on the grill. The corn, still in its husks, soaked in water for about 30 minutes while the grill was getting hot. Then my husband stuck it on the grill for 20-30 minutes, as we usually do. After taking it off the grill, he let it steam in a paper bag, while the sausages and onions cooked. He added a new tasty step at the end of the process: he pulled back the husks and put the corn straight on the grill. By finishing it off this way the corn browned in a few places, the sugars carmelized, and the resulting flavor was wonderfully smokey and sweet.
Luckily, one of our friends had the energy left after dinner to whip up a batch of brownies from scratch. She followed the Joy of Cooking recipe and they were a perfectly rich chocolate treat.

Thursday, July 2, 2009

Radishes, Turnips, Cabbage, oh my!

Along with a ton more kale, spring greens, lettuce, and garlic scapes, we got daikon radishes and hakurei turnips. I must confess we've gotten the turnips before and I haven't figured out what to do with them. I ate a couple raw but that got old. Last night I shredded about 4 hakurei turnips and added chopped cilantro and lime juice. It made a tasty little slaw.
Speaking of slaw, I also made a traditional cole slaw based on a Cooks Illustrated recipe. I used a pre-packaged bag of cabbage and carrots because we can't eat a whole head of cabbage worth of slaw in a timely fashion. I wilted the shredded cabbage with salt according to the recipe and I didn't notice the difference in absorption that they claimed wilting should make. I made the dressing loosely based on their proportions. The recipe calls for 3 lbs. of cabbage and I used 1 lb. For the dressing, I used about 1/4C buttermilk, 1T mayo, 1T sour cream, 1t cider vinegar, pinch of sugar, black pepper, and 1 sliced shallot. The recipe called for parsley but I didn't add any.
And back to the farm share...I used one daikon radish last night and followed the suggestion on the farm collective website to pan fry radish slices. I was skeptical but it was pretty tasty. I sliced the radish in 1/4 inch thick coins and fried in a hot pan with vegetable oil and few drops of sesame oil. I finished them with a bit of sea salt and they were tasty little treats.

Wednesday, July 1, 2009

Kale Chips


Based on a recipe posted on our farm collective's website, I made kale chips. I washed the kale and cut most of the larger leaves in half. I should have cut the leaves into smaller pieces, maybe quarters. I also should have trimmed more of the tough stems from the spines of the leaves. I tossed the leaves in olive oil but it would have worked better to just lightly spray them with oil as they were too greasy. I spread them on a cookie sheet in one layer and sprinkled them with salt and pepper. Into the oven they went at 250 degrees for 30 minutes. Surprisingly tasty!